
 I started the router table cabinet joinery on the table saw. First I laid out the offsets for the shelf (and drawer) heights and started cutting. I realized that even with 1/4 deep cuts, the center dividers were going to be weak where the shelf cuts occured on both sides. So I was pretty careful with the parts. I also planned on making the drawer dust panels inset full width (3/4″), but decided on the fly that 3/8″ was going to be enough of a slot to support a dust shelf. I batch milled the four front dividers and then moved on to the back and center divider.
The back has a single slot up the center for the cross divider that will be cut to about 2/3 the height of the unit. I want some space open clear across the top to allow me to store the fence and safety guard from the table saw when they are not in use. The center cut was eyeballed, then I moved the fence out about 1/16″ of an inch. From there I just flipped the board over after the first cut, to make a 2nd pass and make sure the slot was centered. When I got close to the final width, I made the fence movements smaller, and checked after every pass to see if I had a good fit. Using this method I snuck up on the final fit.
The center divider had the center slot on the back face, but on the front face I have to slot it for the 4 drawer dividers. First I set the outside of the blade away from the fence to the thickness of the drawer divider and made my first cut. Then I moved the fence away, rotated the divider 180 degrees, and lined up the slot I just cut on the blade, and set the fence. This allows me to move the fence away an 1/8″ at a time, to create the rabbets. Once those are cut, I then reset the fence to make the inside divider (outside edge — follow that?) – set in for a drawer width of approxiamately 6″. Rotating the board 180 degrees on it’s face I then cut 1/8″ slots on both sides to complete the through cuts.
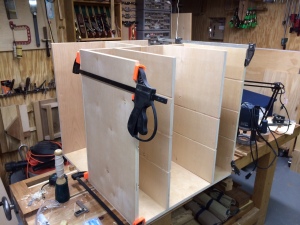
The picture shows the assembly at this point – next are the stop cuts for the rest of the slots.

Pingback: Joinery begins on the router cabinet | Brian's Workbench