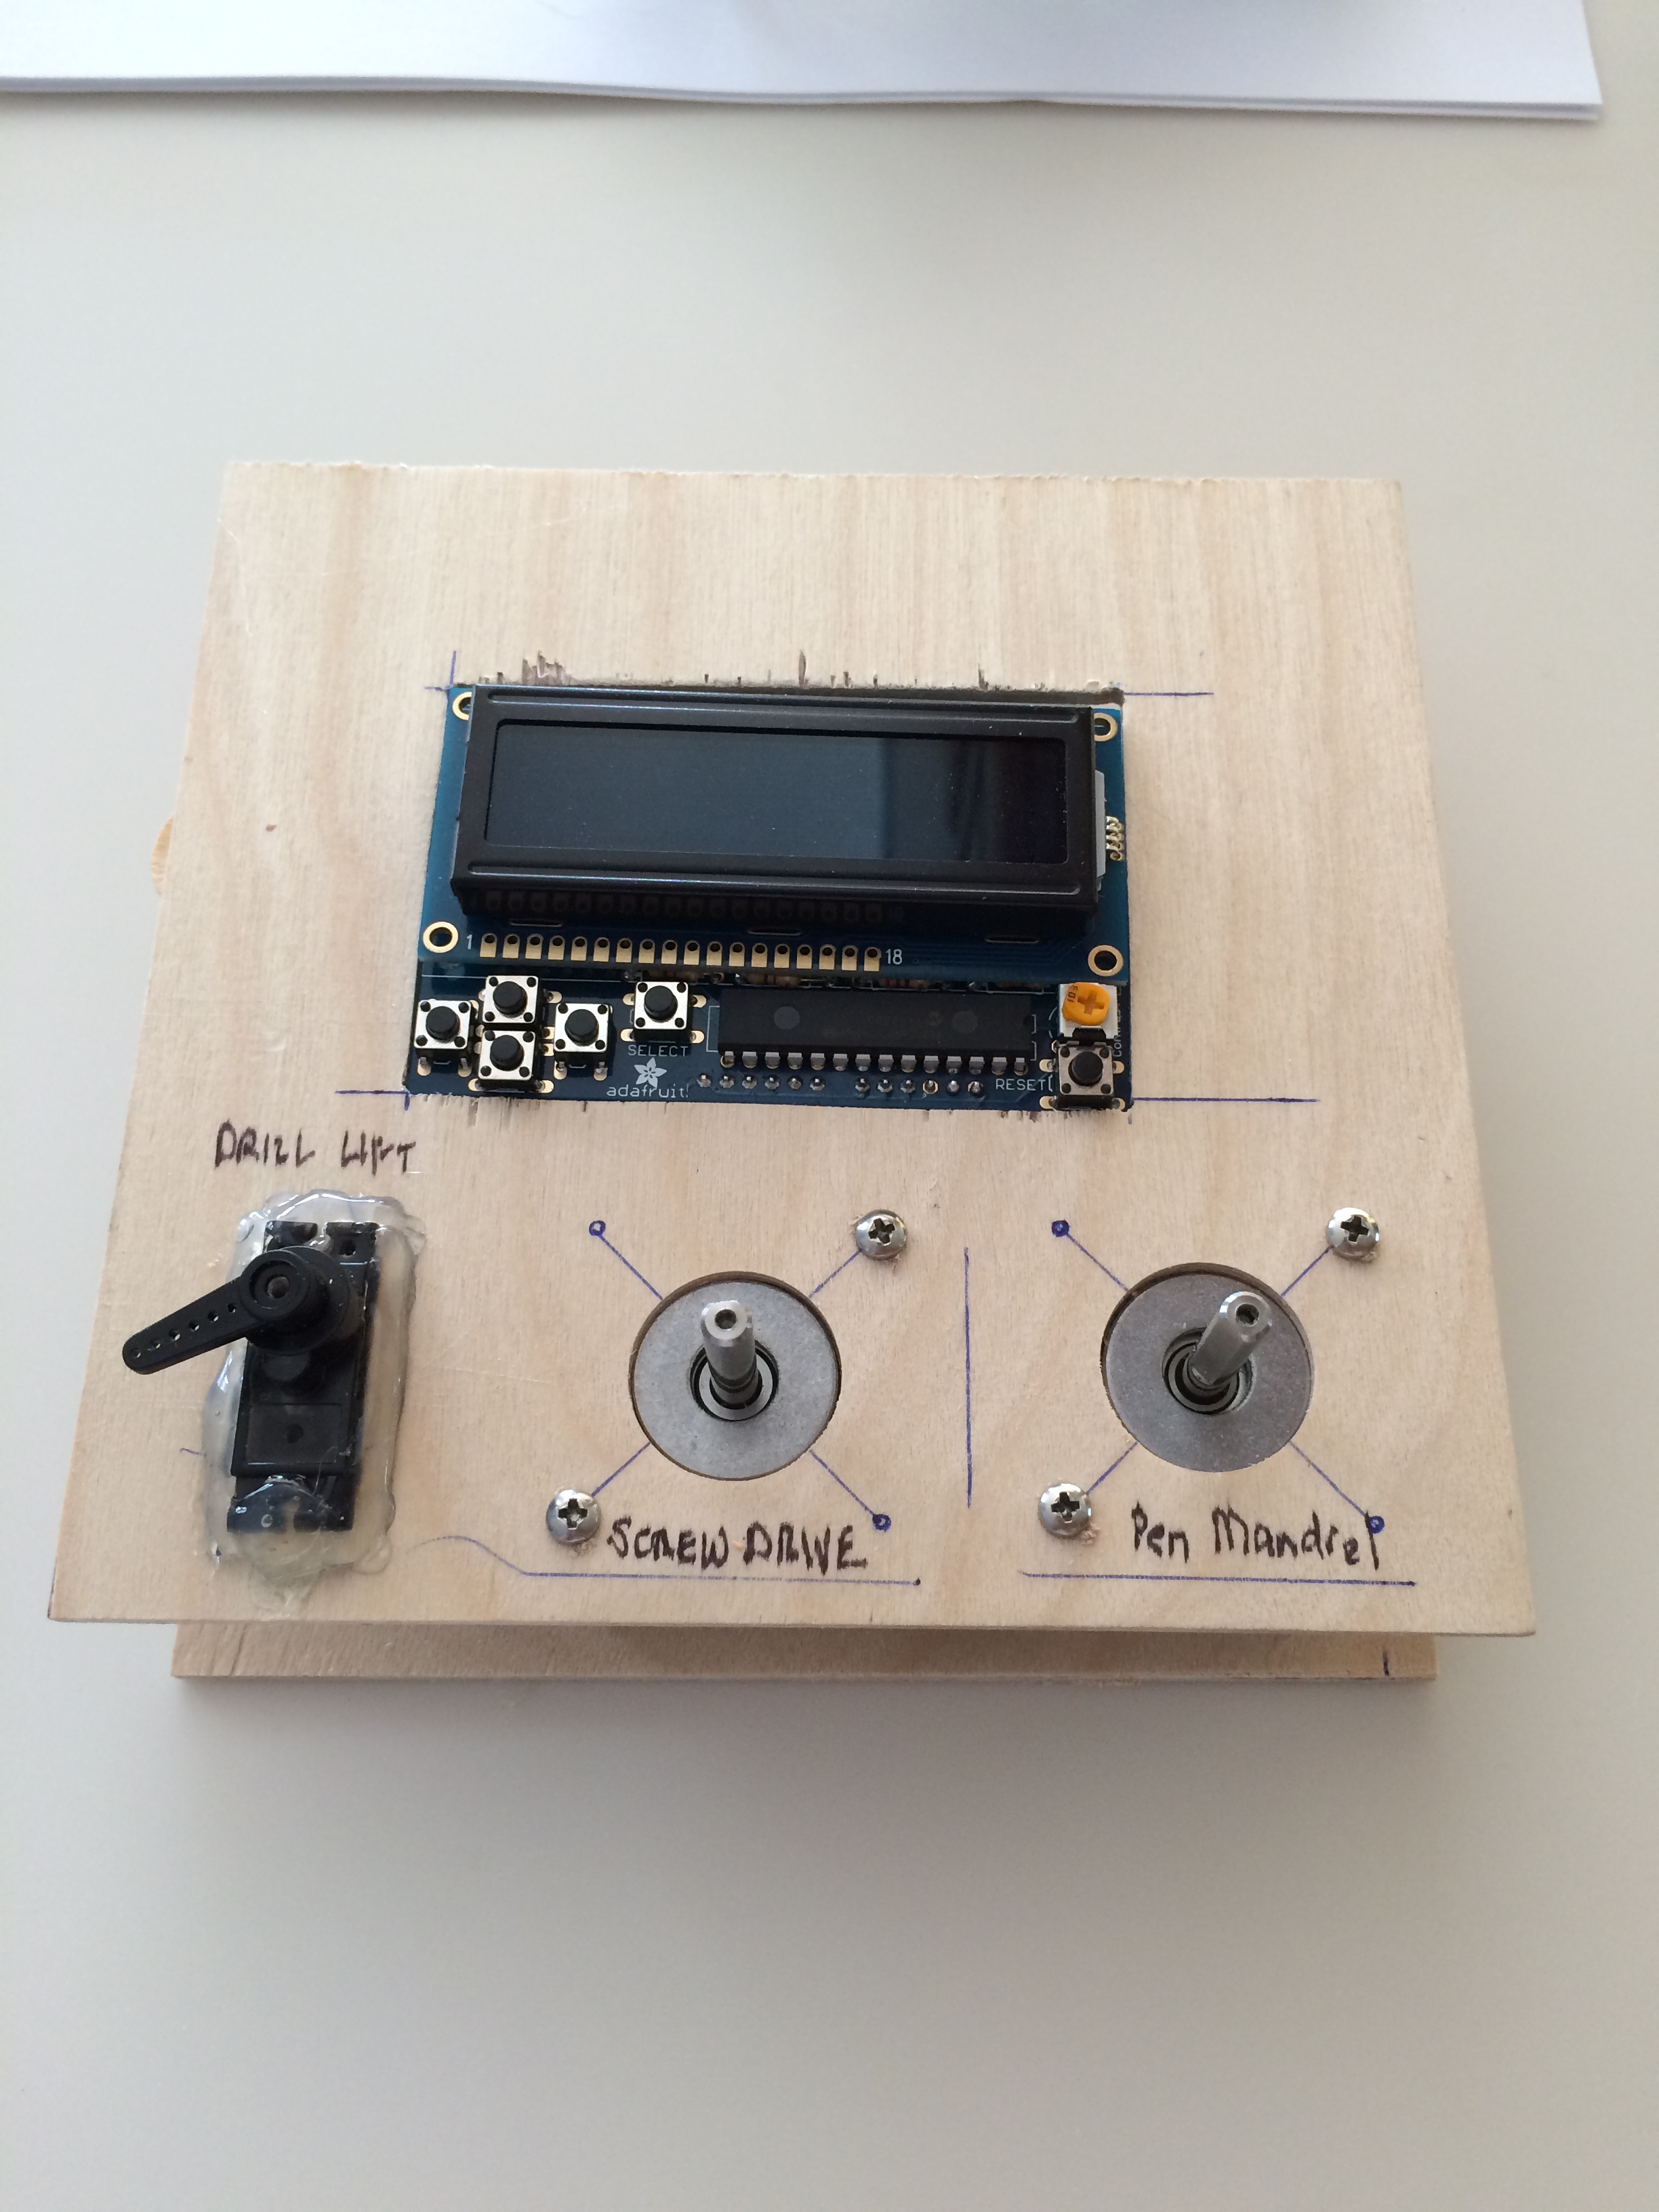
The next stage of development is in progress
– I got most of the code running on the test jig this week, and once I got it to a point that most functions seemed to work – it was time to put it into a practice jig. But before that happened, I got two micro switches to use to detect when the drill platform hit the far right and left points. Originally, I was just going to mount these so that I could tell when the drill platform hit the ends Continue reading
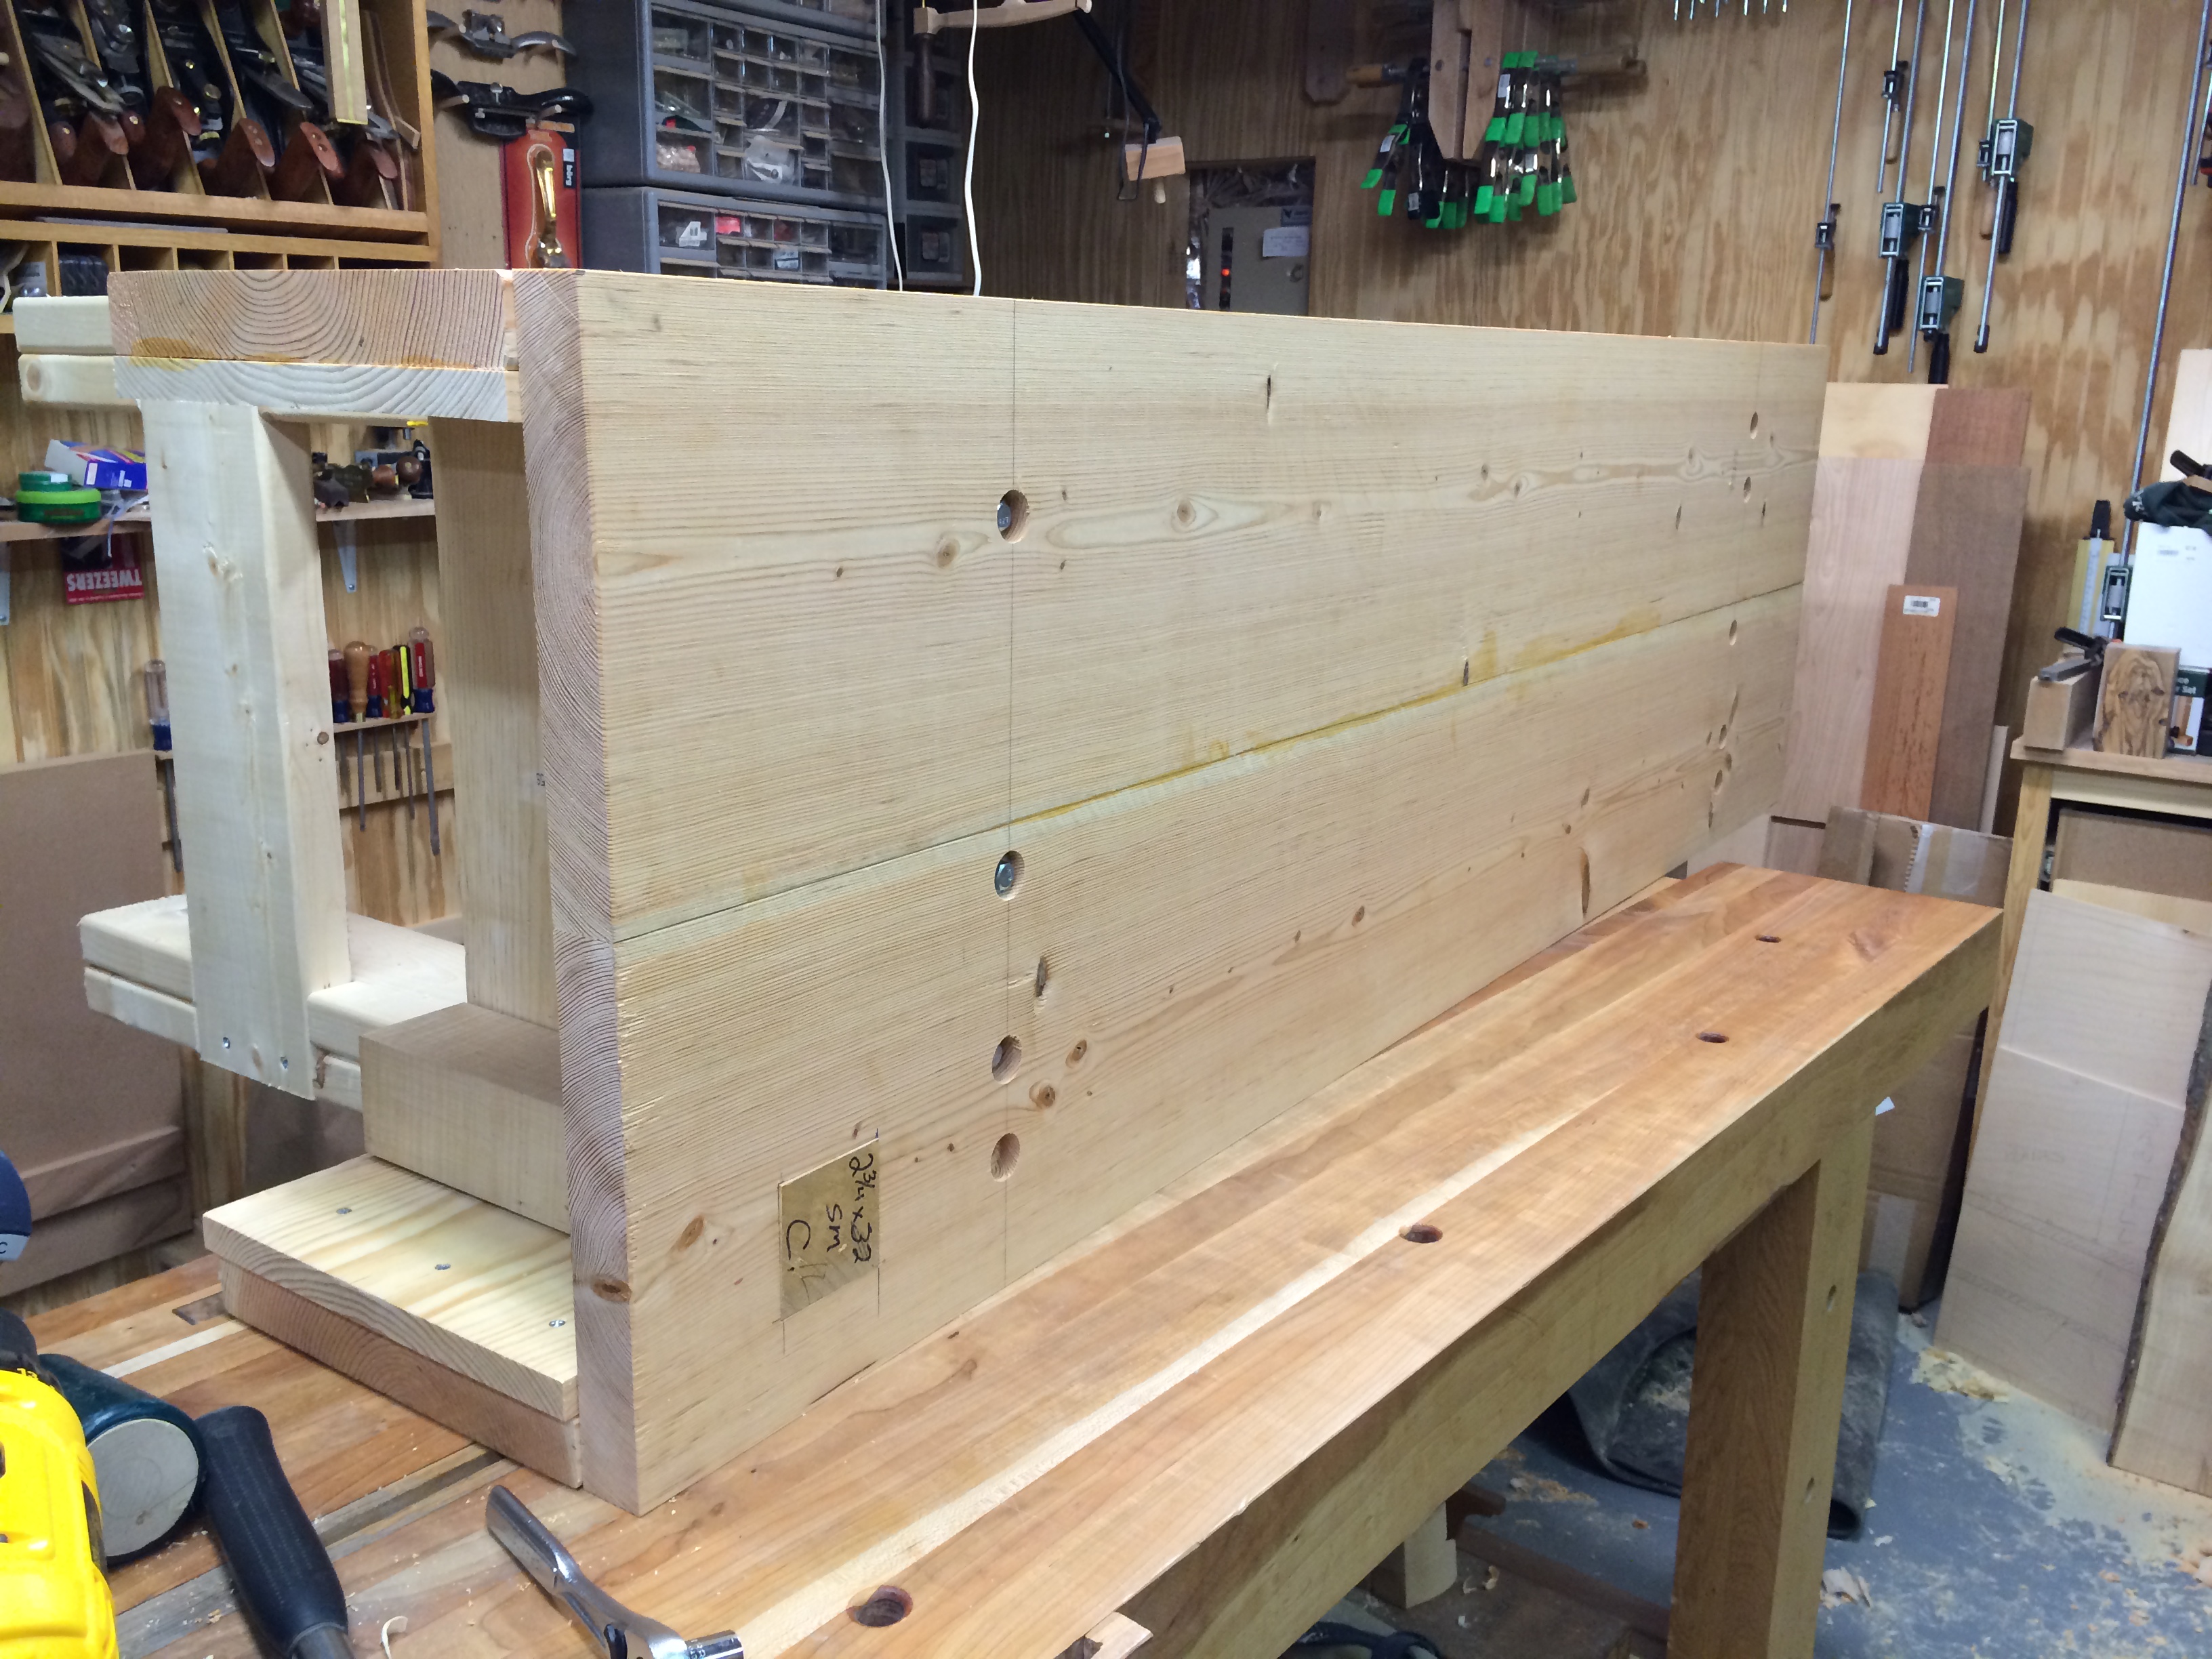
Pen Decorator – parts list(s)
For those that are interested, I’m going to keep a compiled list of parts, prices and sources for the project here. I already have a couple more parts on order, and if they work out, I’ll update the list to include them as well.
Pen Decorator Test Harness
To be able to work on part of a project, while on the road is a bit of a challenge. I cobbled together a jig to hold the controller and motors to allow me to start working on the controller code while I was on a business trip. The gory details are in the update to the pen decorator project.
New Project: The Pen Decorator
Ok, I admit it. I don’t just do woodwork. I also like playing with photography, and have a ham radio license (KC8MNS). It’s the latter that got me in trouble – because coupled with my professional background as a software systems architect (computer programmer) and the love of building stuff, even with electronics, I was ripe for the picking… read about it here
The Hag’s tooth
(I think I was turned on to this by Shannon Rogers in the Hand Tool Workshop – and since then, it’s been a go to item in my kit.)

Its one of my favorite tools, because of it’s simplicity and general utility is a router plane. I have a pair of small ones that I use for close in work, hinge mortising and fine trim work. I have a pair of largers ones set up with optional fences and with different style blades. They excel as working on the bottom of flat surfaces that need trimmed parallel to a higher face.
Continue reading
Knockdown Nicholson Workbench – wrapping up
I built the bottom shelf using the little wedges on the ends, glued a 1×1 cleat to the inside of each bottom stretcher (2 1×10’s glued and cut back down to 15″ wide), and screwed in battens across the shelf at 3 points. I finished drilling the 3/4″ holes in the apron, and in the top strechers of both legs (great idea there from Chris S. and company!). I order a new pair of holdfasts from toolsforworkingwood and cut some(4) 5″ lengths of 3/4″ dowel for support posts.

The posts fit a bit too tightly, so I used my favorite turning tool – chucked the posts on the lathe, and added a tiny taper to make sure they fit well.
Last but not least – I flattened the top – using a #6 plane, sharp blade and some canning wax for lubricant. It took about 45 minutes to bring it to flat enough.
Thanks again to Chris Schwarz for bringing out the plans and the parts lists.
Quick tip… when you have to drill stepped holes backwards
I drill out lots of these holes, and the process is simple. Start with the largest diameter bit, then when done, move to the next smaller size and drill further, using the center point remaining from the first bit.
But what happens when you need to drill the shoulder, after the smaller hole is already there? If you’ve tried it, you know that the bit will wander mercilessly when you try to start.
My solution? Use a second block of wood as a guide. Drill the larger hole through the second block all the way. Now, center the hole in the second block on the first hole in the original piece. Clamp the blocks together. Now you should be able to use the second block’s hole the capture the bit, and guide the starting cut into the original!
Knockdown Nicholson Workbench – oops!
Sometimes we just bull ahead in a project build. “I don’t need to measure, I have an idea where things are”. While drilling the recess and holes for the mounting bolts in the top, I got to close to the edges. I missed the legs ok, but wasn’t far enough inside to allow for the mounting nut to be attached. So, after I got the holes placed correctly, I had to mix up some epoxy to fill the mis-located holes and that means leaving it over night. Yes, I could have left the holes as is, but who wants to do that! And since I left the epoxy clear, there will be a visual reminder that I goofed to talk about 🙂
Knock Down Nicholson Workbench – assembly
The McMaster-Carr connectors that I ordered late last week arrived yesterday, so I was able to get much further in bench assembly than I thought I was. I glued the 1×10’s to the aprons, after setting them in place on the upside down top of the bench. Using the 1×10’s as a guide, I set the legs up tight against the apron, and was able to mark and secure the legs to the aprons using the connectors.
Knock Down Nicholson Workbench – getting started
I picked up about $130 of construction grade lumber at home depot saturday night…


